Monday, March 24, 2014

Roof Repair: Part 6

 
After weeks of awaiting the right conditions for laying down the final coat of Liquid Roof, a Saturday finally presented itself with fairly sunny and temperate weather.  After mixing and rolling the layer, I pulled the camper into the open sun for some drying.


Of course, it would be another few days before the shell had cured and the roof was dry enough to continue.  In the menatime, I checked the continuity of the rubber to make sure I got a fairly even spread across the surface.  I learned that I should have started with the foam rollers in order to get a smoother surface, but I kind of liked the rough texture over a perfectly sheened covering.


My next work day would not come for a couple of weeks, where by I spent a pleasant Friday afternoon replacing the rubber gasketfor the air conditioning roof vent.  A bit of Gorilla Glue seemed to do the trick, drying and sealing the edges around the gasket.  A friend and I hoised the A/C unit back onto the roof, and then began raising the popping up the camper to re-attach the internal controls.


Again, a bit of Gorilla Glue provided a nice weather seal for the unit.  Once we had put the cowling back on for the internal vent cover and slid the knobs back on to the controls, we expanded out the bunks and re-ran the wires for the A/C power and lighting.


The only work left now is to screw back on the latches and glue a new lid seal/gasket on to the bottom of the roof shell.  We should be camping in no time.

A bit more to come...

Thursday, January 30, 2014

Roof Repair: Part 5

After a week of waiting out the sporatic Texas winter weather, the weekend came and gave us a pleasantly mild and sunny 75 degrees.  I wasted no time in taking advantage of the little warmth I had before the next onslaught of cold weather.


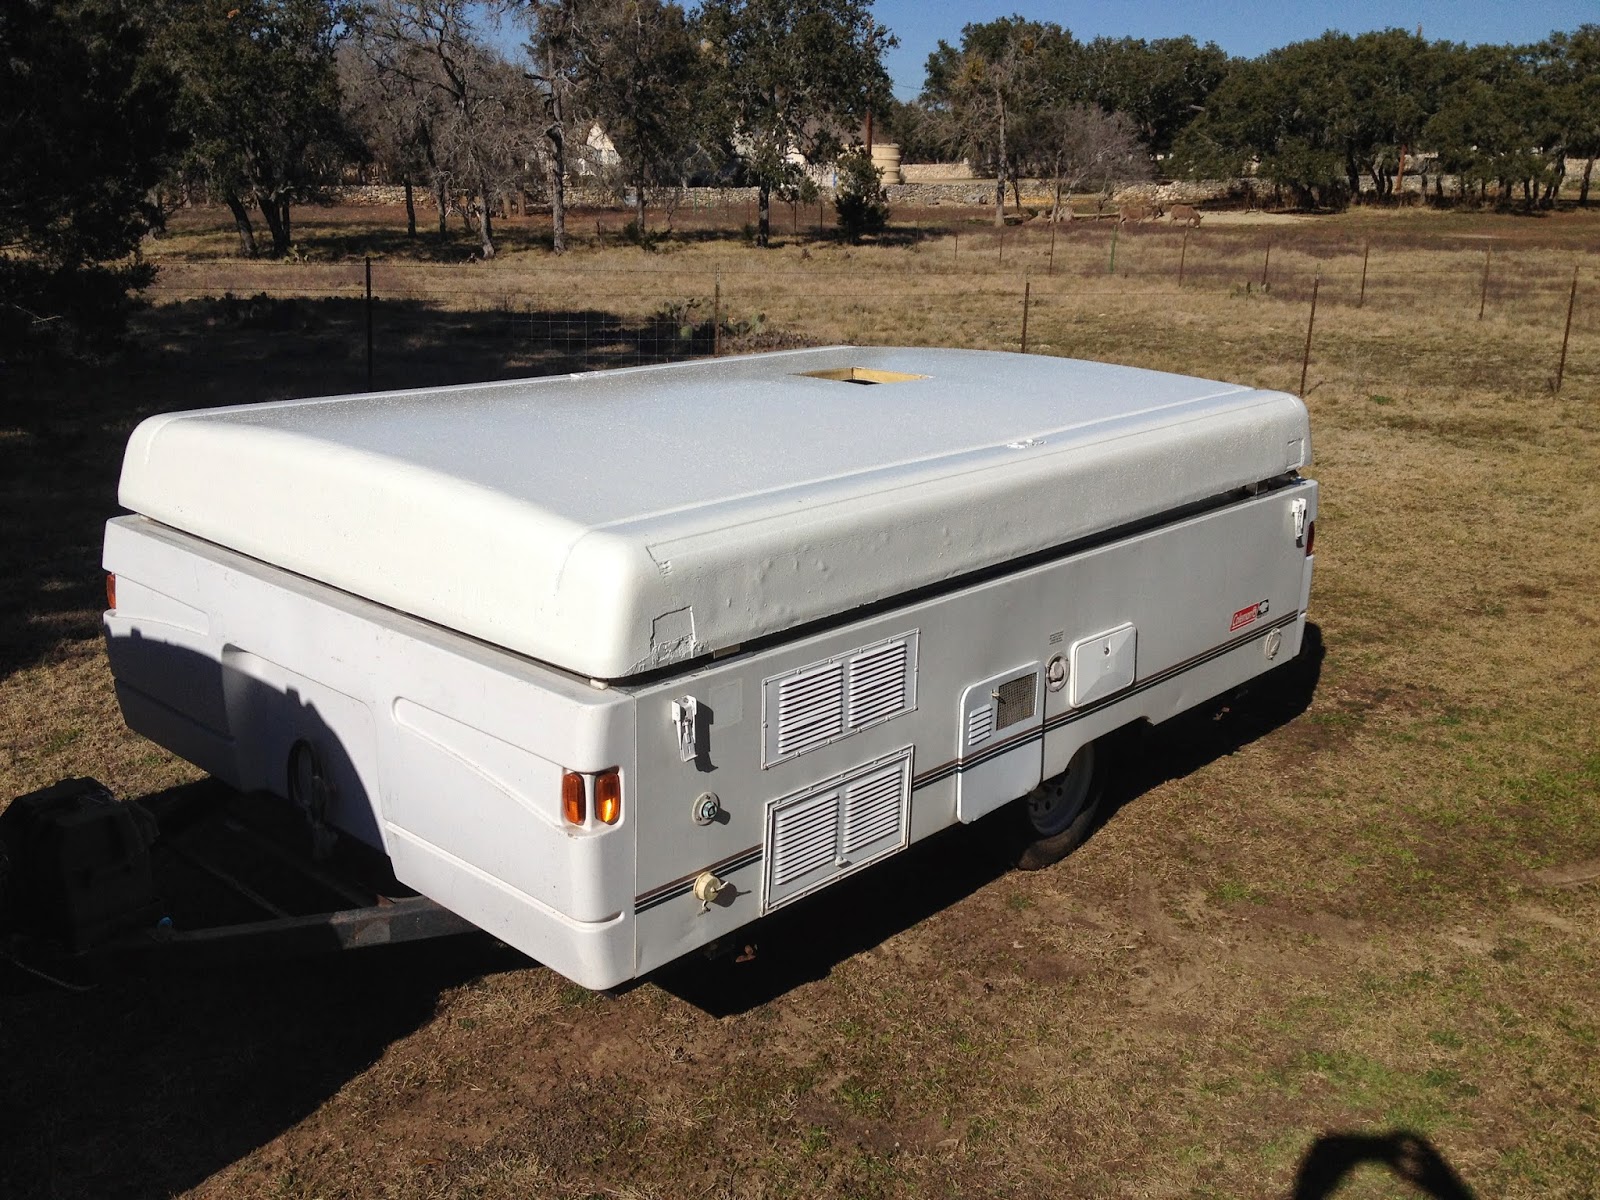
I broke out the random orbital sander and smoothed out the edges of the glazing putty I had laid down.  Once I was satisfied with the result, I applied another coat of the urethane primer over the entire roof.  The results were pretty nice, as I now had a perfectly etched surface on which to apply the liquid roof.


A 2 gallon paint bucket, and a mixer attachment for the drill was needed in order to properly mix the EPDM coating with the bottle of catalyst.  I started by only mixing 1 gallon of material for use with the first coat.  The instructions called for mixing it for about five minutes, but I mixed a bit more just to make sure.


Everything I had read about mixing and using liquid roof had indicated how difficult a material it is with to work.  They were all wrong.

It is nearly IMPOSSIBLE.

This product should be renamed White Tar.


I started by attempting to apply thin coats around the edges of the Air Conditioner port.  It spread like frozen molasses.  By the time I had worked around the edges, it switched to the "pour and spread" application method.

I attempted to spread it along the top of the roof with a squeegee, but this proved impossible as well.  I finally broked out the paint rollers and rolled the material from every angle along all the exposed surface I could find, going back and touching up the bottom edges of the roof with brushes.


I have to say, the first coat results look pretty impressive.  The material is supposed to be self settling, though I am not sure exactly how long that is supposed to take as results vary with ambient temperatures.


From every angle, this first coat does look pretty promising, so I left the camper in the garage to dry over the next few days.  The covered storage should help in keeping any loose dust, twings, and insects off the roof while it cured.

Knowing that I would be waiting a while during the week, I chose to find a something small to redo in the camper.


The sink has a wood cutting board that goes over it.  From the looks of the wood, it has been neglected over the years and never maintained.


I decided to oil up the wood to try and keep it from drying out.  In this case, a little lemon oil should hopefully do the trick.

Over a period of days, I applied several coats of lemon oil to the wood, allowing for the cutting board to soak it up and bring out the grain texture.


I will keep applying layers until it darkens up to somewhere near an antique oak color.  Over the next few days I will keep checking on the roof to see the results, and hopefully some more good weather will open up for me to lay down a second coat of the liquid roof.

More to come..

Friday, January 17, 2014

Roof Repair: Part 4

It was a perfect day to get some work done on the roof of the camper, and I took advantage of every hour of daylight I could get.  The forecast called for a sunny day with a high of around 70, so it was time to break out the urethane primer I had picked up from the paint store.


As stated earlier, I used a teo part urethane primer called Advantage 312.  The instructions called for a 4:1 mix ration with the catalyst, and it could be applied with a brush, roller, or even an HVLP spray gun.  Since I am currently compressorless, I chose the combination of roller method and brush for the detail work.


This particular primer seemed to go a long way, and it seemed that a gallon was more than enough to do the job.  I was able to easily lay down two caots, saving the rest for additional coats once I had performed the filler work.

The first coat seemed to dry in 15-20 minutes, and I had the entire roof done in less than two hours.


The light gray color seemed to really expose the pits and crevices in the foam core that were left behind from removing the old ABS shell.  This would proved perfect for going back and laying in the filler.  Also, the urethane primer was highly recommended for the polyester to adhere.


The light gray color seemed to really expose the pits and crevices in the foam core that were left behind from removing the old ABS shell.  This would proved perfect for going back and laying in the filler.  Also, the urethane primer was highly recommended for the polyester to adhere.

For the filler, I chose a glazing putty made by Evercoat.  It came highly recommended by the paint shop for the work I would be doing.


I let the primer set in for several hours then went back along the edges on which I found any pits, spreading an abundant amount of the putty over each spot I could find.


As the sun set for the evening I wheeled the trailer back into the garage. allowing for the glazing putty to set in overnight.  Hopefully the lower night temperatures do not affect the curing process as it is supposed to get get down around 37 degrees fahrenheit for the low.

More to come..

Thursday, January 16, 2014

Roof Repair: Part 3

Well after some more research, I discovered that using epoxy based resins would most likely melt the foam core left behind from the ABS I had removed from the camper roof and trashed.


The cracked material I had removed took up two entired trash cans, even after I broke it down as much as I could.  I had also performed a closer inspection of the foam core roof and noticed that there were some small grooves left behind around the edges of the roof.


I would need to fill these and and sand them down before I could apply my final Liquid Roof over coating.  The question now would be what materials I could use.

I had recently joined a pop-up camper user forum called PopUpPortal.  After asking a few questions in the various forums, I found a specific forum topic revolving around Coleman camper owners who had repaired of replaced their ABS roofs with materials like Truck Bedliner and Liquid Roof.  

The overwhelming consensus was to use a two part urethane-based primer to cover the foam core, and then fill in the pits with a polyester resin such as glazing putty.

A trip to a local automotive paint specialty shop and a hundred dollars later, I have my primer and resin in hand.  While I waited for a day when I had more time to start that phase of the project, I concentrated on removing the lid latches from the ABS backing.


Nothing really special here, as the latches seemed to be adhered to the ABS with a caulk-like vinyl adhesive.  I am not sure exactly what it is but I am sure I could do a bit of Googling to easily find my answer.


After some simple scraping of the latches to pry them from the remaining ABS backing, I cleaned up the latches and will create backing metal plates for tehm once I finish up the primer and filler on the roof.

More to come..


Sunday, January 12, 2014

Roof Repair: Part 2

Well it looks like no repair work will be happening today.  A light rain moved in and sprinkled the entire area, so I will most likely shop for some fiberglass and epoxy materials for touch-up in certain places.


In the meantime, I moved the camper into the garage while I wait for more favorable weather conditions....

Roof Repair: Part 1

After getting the camper home, I spent some time researching what my the best course of action in repairing and replacing the cracked ABS roof.  At first, I thought I might take a similar route that I used for fiberglass repair on my sailboat.  After a bit of Googling, I found a product called "Liquid Roof".

A bit of reading on their website helped me determine that I would need a little more than a gallon of this stuff to try and resurface the roof on the camper.  I found a pretty good deal on a couple gallons on Amazon, and since I am a Prime Member I went ahead and ordered two gallons.

A couple days later after receiving the Liquid Roof can shipment, it was time to get started.

I began by raising the camper and removing the mounting bolts for the roof-top Air Conditioning unit.  This was actually a straight forward process, and honestly the easiest chore of the day.


Once the A/C mounting bolts were removed, I lowered the camper roof and a couple of us lifted the unit right off the roof.  We were very careful to try and preserve as much of the gasket as possible.  We would most likely need to measure and cut a new one later.

With the A/C unit off the top of the camper, we began using a paint scraper to strip off the old weathered ABS roofing.  Most of it came off with ease, as water had penetrated through the cracks and had worn away the glue underneath.


The difficult part came when we got to the very rear of the camper top.  The old roof was still very much adhered to the fiberglass and foam shell underneath.  It tooke three people, some scrapers, and a can of acetone, but finally we had managed to scrape away the entire coating, leaving nothing but the bare foam core underneath.


The only other tricky part was removing the lid latches from the roof as we scraped off the old ABS shell.  There are still pieces of the ABS backing on the latches, which I will have to acetone and scape off for replacement after I done recoating the roof.

Again, more to come...

Another project

Looks like I found another recreational activity that required some project work.  To house the grandkids for the holidays, my dad had picked up a 2000 Coleman SantaFe off CraigsList.  The price was just too hard to pass up.  The idea was that the kids could play and sleep in the camper, leaving room for the adults to play in the house.


 This particular pop-up campter was very clean, inside and out.  The only issue we could find were stress cracks on top of the orginal ABS roof.  Knowing this fact, the camper was still a great deal.


 As you can see from the photos, the inside is very clean and extremely spacious for a pop-up camper.  The front bunk is a full-sized queen mattress, and the rear was a standard full.  The camper included an internal propane stove, sink with water pump, a refrigerator, and even a microwave.


After the holidays had passed and the grandkids had gone home, my dad had decided to go ahead and sell the camper.  I instantly jumped at the price, and made arrangements to meet him on a day where I could purchase the camper from him and tow it home.

When we had finally found a day that would work for both of us, we met halfway in central Texas to make the exchange.  Unfortuantely, during transport pieces of the old ABS roof had finally given in and torn off from the windsheer of highway travel.

I had already anticipated having to perform a repair or replacement of the camper roof, so now it was time to do a little bit of research to see what my best options were.


More to come..